Ray-Check V-1, Calibration Block IIW - Metric

Ray-Check V-1, Calibration Block IIW - Metric

Per BS-2704

Per BS-2704, DIN 54-120, AS 2803 & ISO 2400

Geometry:

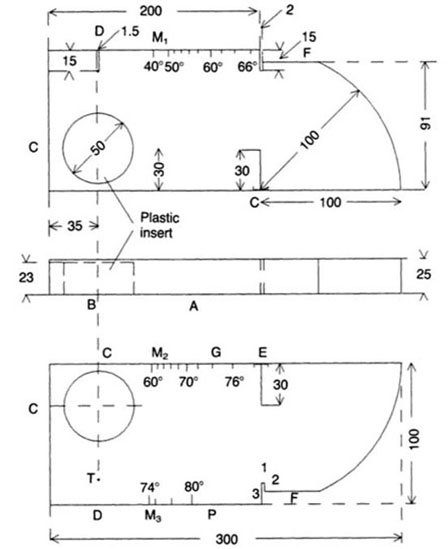
  • Thickness of 1" / 25 mm, Height of 4" / 100 mm for straight beam calibration.

  • 4" / 100 mm radius with saw cut at Index Point for Angle Beam Calibration: Determining Beam Index Point and Distance Calibration (signals at 4" / 100 and 8" / 200 mm).

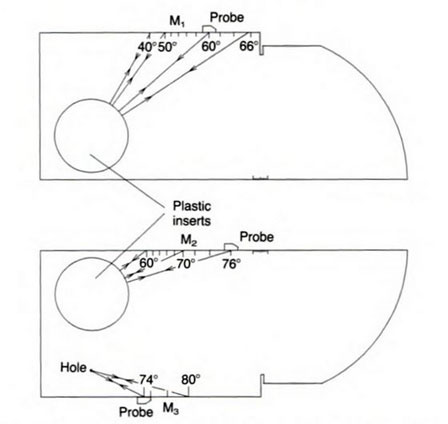
  • 2" / 50 mm bore hole for Probe Angle verification

  • 0.06" / 1.5 mm bore hole for sensitivity adjustment

Materials

Standard Materials

  • Carbon Steel A36/1018
  • Aluminum 7075
  • Stainless Steel 304
  • Titanium 6/4
  • Inconel 600
  • Monel 400

Purchasing Details:

  • All blocks are supplied with Manufacturer Certificate of Conformance and Material Certification.
  • Dimensional / Calibration Certification and Serialization are available at additional cost.
  • If needed, make sure to select UT-RC-V1-Cal when adding items to the shopping cart.
  • Optional Hardwood Case available upon request.
Description Part # Saved Price Select Option Add to
V-1 IIW Calibration Block, Metric (select material)
Model #
UT-RC-V1-CS-Master $554.00
V-1 IIW Calibration Block, Calibration and Serialization UT-RC-V1-CAL $152.00
V-1 IIW Calibration Block, Wood Case UT-RC-V1-CASE $89.00